|
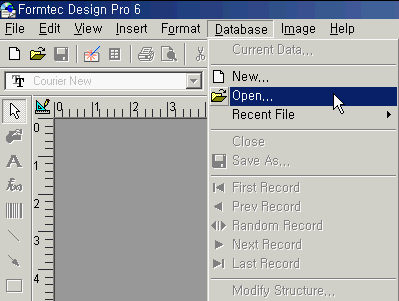
1. Select Database-Open from menu to create Open File window, then select File to create Data Input/Browse window.
|
|
2. From this Data Input/Browse window, you can input/browse an address book (database). The Data Input/Browse window is illustrated below. The icons will be explained from Data Input/Browse window, firstly.
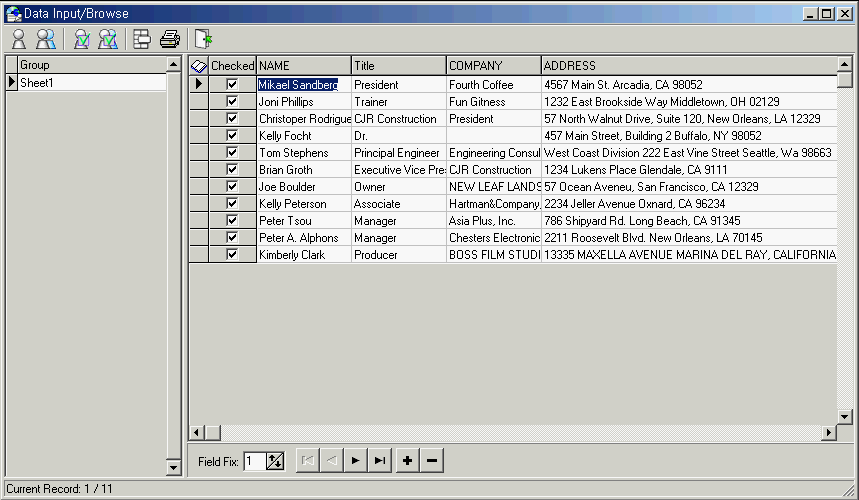

(1) Add members
(2) Add groups
(3) Check/uncheck the whole members
(4) Check/uncheck the whole groups
(5) Select print range
(6) Print database list
(7) Close

(8) Fix fields
(9) Move database - beggining, previous, next, last
(10) Add
(11) Delete
|
|
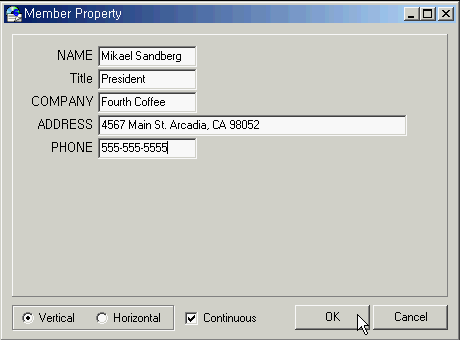
2-1. Add Member
It is used to add new cells to database or to register a new product.
It is more convenient to select Continuous checkbox and
to input much data without selecting Add Member many times.
|
|
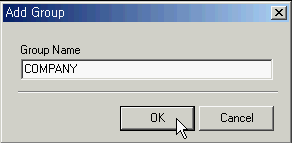
2-2. Add Group
It is used for database to divide into groups in address book. When printing, It is more efficient data management to print data by group or the list of data.
|
|
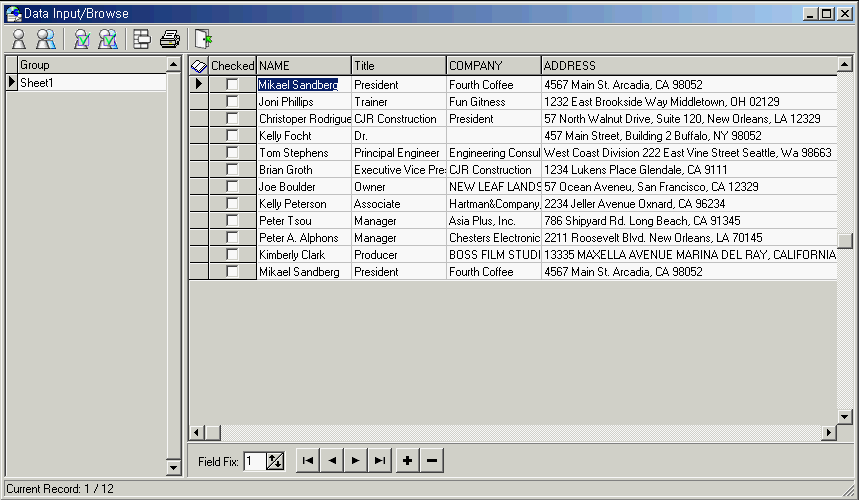
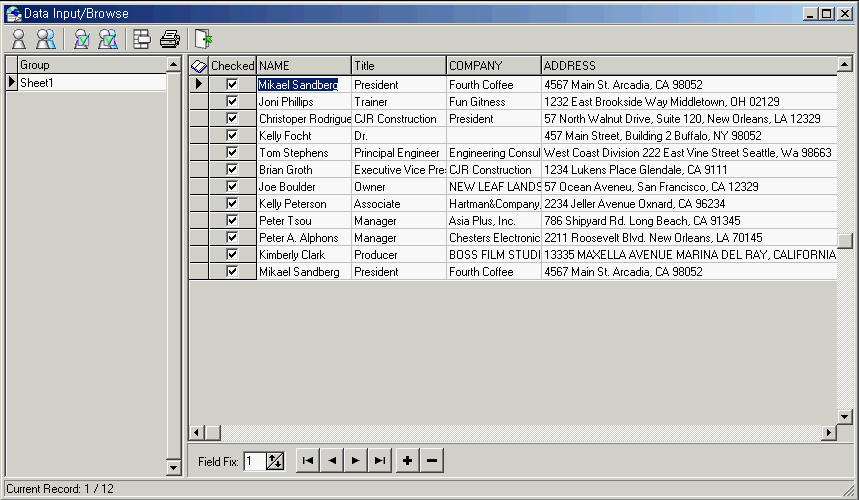
2-3. Selecting all members
This feature is to select all members.
You can select/deselect the member by clicking Checked checkbox.
|
|
2-4. Selecting all groups
This feature is to select all members of all gruops in the database file.
You can select/deselect the member by clicking Checked checkbox..
|
|
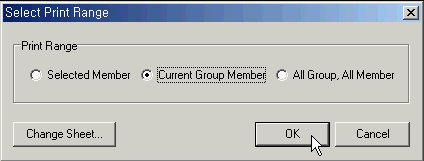
2-5. Selecting print range
This feature is to select print range to print address data.
The data of the selected member are printed by clicking Selected Member radiobox,
the data of the current group member are printed by clicking Current Group Member radiobox, and the data of the all members in all groups are printed by clicking All Member.All Group radiobox.
|
|
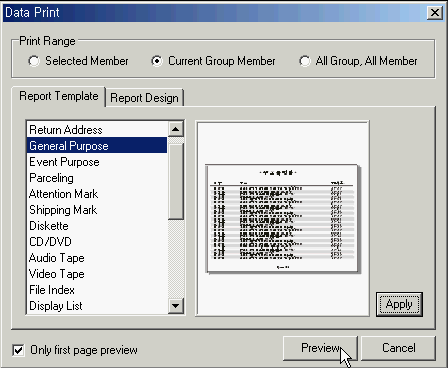
2-6. Printing the data
Print
This feature is to print the input address list. Users can design the report by selecting items in Report Template and Report Design, and also create various their own design.
|
|
(1) Report Template
The templates in Report Template listbox can be printed, or view them in Preview box by selecting a template in Report Template listbox.
|
|
(2) Designing a report
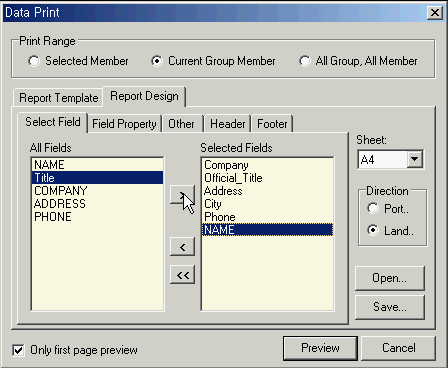
Select Field
This feature is to select the design for printing a report. Users can select the field desired for printing design, and also view the report by clicking Preview button.
|
|
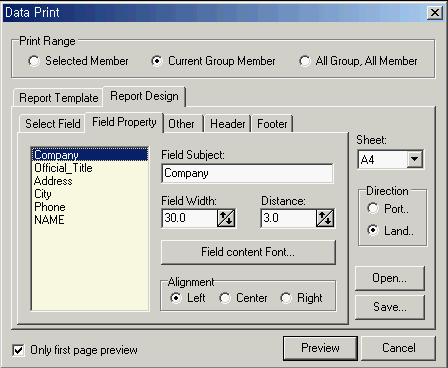
Field Property
Input a field name in Field Subject textbox. Adjust field width and distance by inputing the number in Field Width and Distance textbox.
Change the style and size of the font by clicking Field Content Font button, and also view the report by clicking Preview button.
|
|
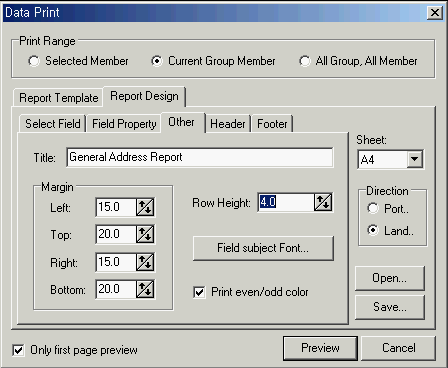
Other
Input the title of the report, and adjust the margin of report.
Adjust row height by clicking Row Height textbox, and change the style and size of the font by clicking Field Subject Font button, and also view the report by clicking Preview button.
|
|
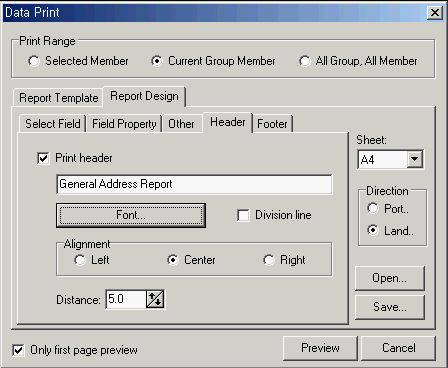
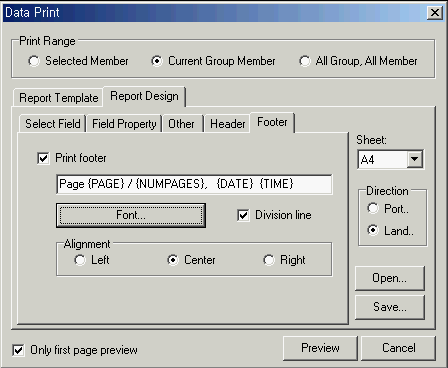
Header & Footer
Input the text of the header and footer in the report. Select Divition Line checkbox, and change the style and size of the font by clicking Font button, and also view the report by clicking Preview button.
|
|
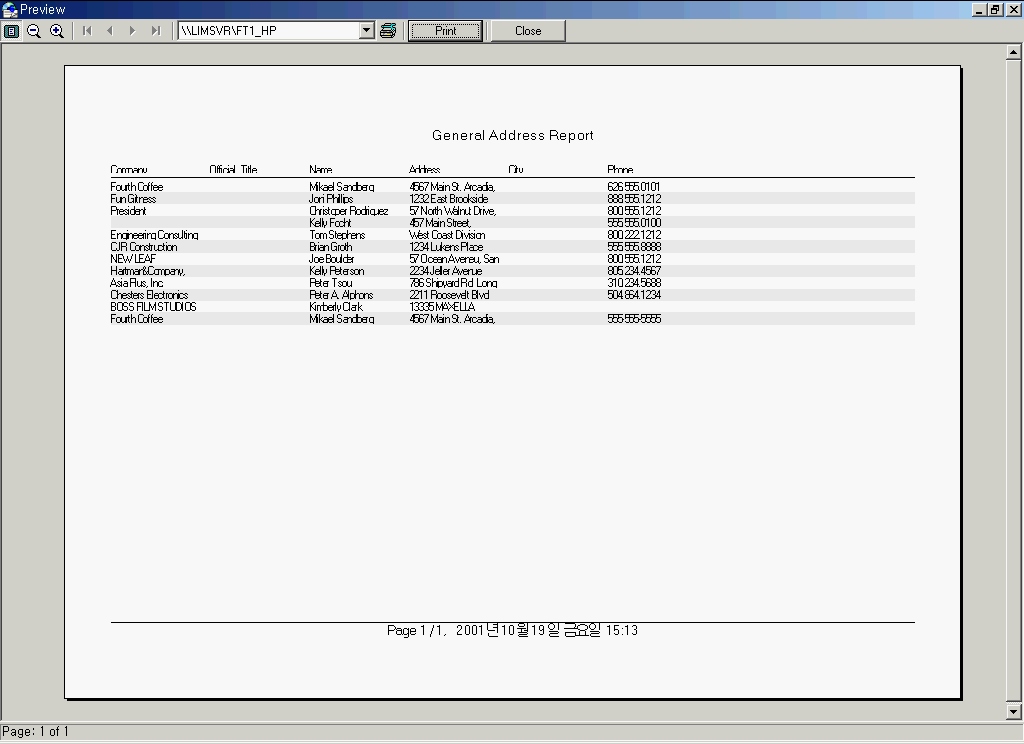
Print Preview
This feature is to preview the printed list of data. Report Template and Report Design is applied in the printed design, and also view the report by clicking Preview button.
|
|
2-7. Close
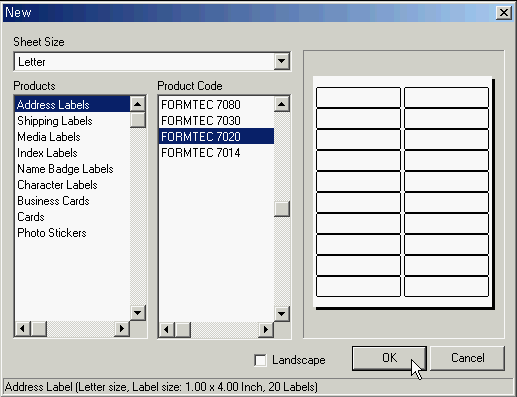
After inputing data in Data Input/Browse window, this feature is to close for printing the data. When closing the window, if the sheet isn't selected, Select Sheet window pops up, and if the sheet is selected, Field Layout window pops up.
|
|
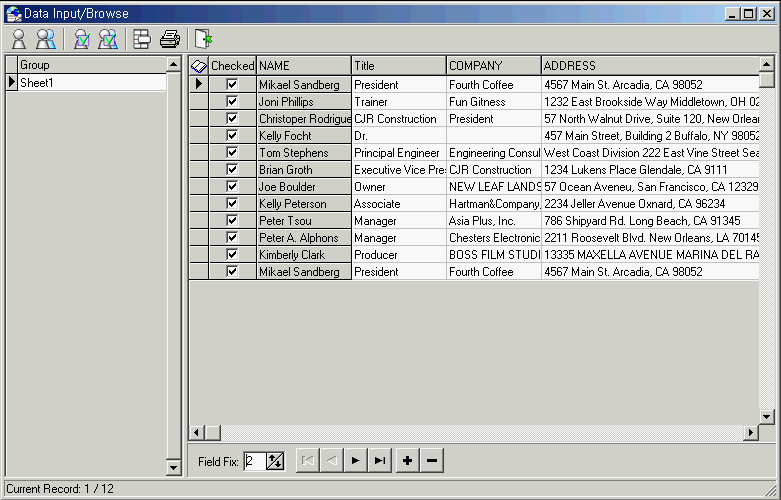
2-8. Locking field
The feature is to input additional data in locked other fields and also to confirm the printed data.
Select the field to be locked from left to right.
|
|
2-9. Searching data
Data can be
searched first, previous, next and last within the database.

|
|
2-10. Add
This feature is to add new member in input data.
2-11. Delete
This feature is to delete the member in input data,
but deleted data can be recovered.

|
|
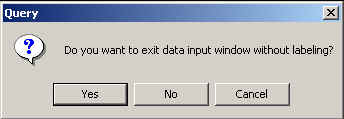
If click ( ) icon in upper right of Data Input/Browse window, Query window pops up. ) icon in upper right of Data Input/Browse window, Query window pops up.
If click Yes button, all label operations are stopped and Data Input/Browse window closes. If click No button, Data Input/Browse window closes, Print Range window pops up and continue to work on designing labels. If click Cancel button, back to Data Input/Browse window you are working.
|
|
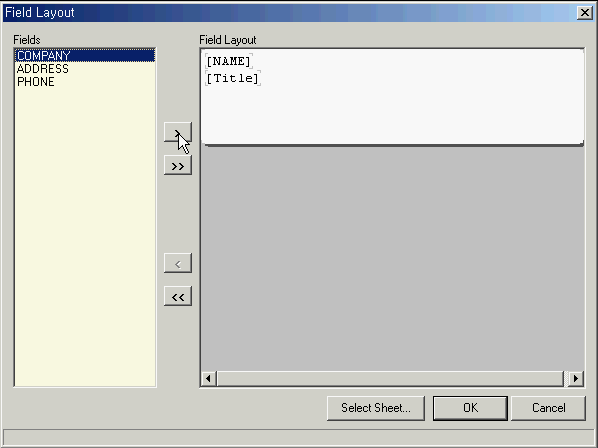
3. Field Layout
You can select the fields to be printed on the selected label sheet, and design for label printing by changing their position with the mouse.
|
|
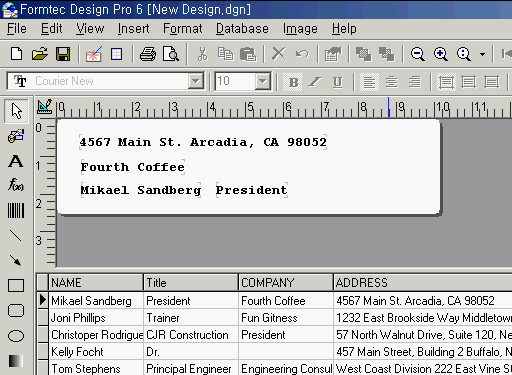
4. Design Window
The main window for printing labels appears, where various editing features
are available such as changing font or size as well as saving and printing.
|


![]()


![]()
![]()
![]() ) icon in upper right of Data Input/Browse window, Query window pops up.
) icon in upper right of Data Input/Browse window, Query window pops up.


